When it comes to industries such as manufacturing, construction, or aerospace, guaranteeing material quality is non-negotiable. Material testing is a critical process to validate strength, durability, and compliance with industry standards. Many establishments rely on external laboratories for these tests. However, forming a long-term partnership with such labs can become a costly endeavor, particularly for companies requiring frequent or high-volume testing.
For businesses dealing with a lot of tests, the financial strain can quickly add up. Outsourced services, while reliable, often come with limitations, such as scheduling delays, dependency on third parties, and higher costs per test. Over time, this reliance affects the budget and hinders operational efficiency.
The solution? Establish your own material testing laboratory. By investing in an in-house setup, you gain full control over testing schedules, customize equipment to your specific needs, and significantly reduce costs.
This article will guide you through 4 steps to creating your own metal testing laboratory, making sure it meets your business demands and contributes to your overall operations.
What are Metal Testing Laboratories?
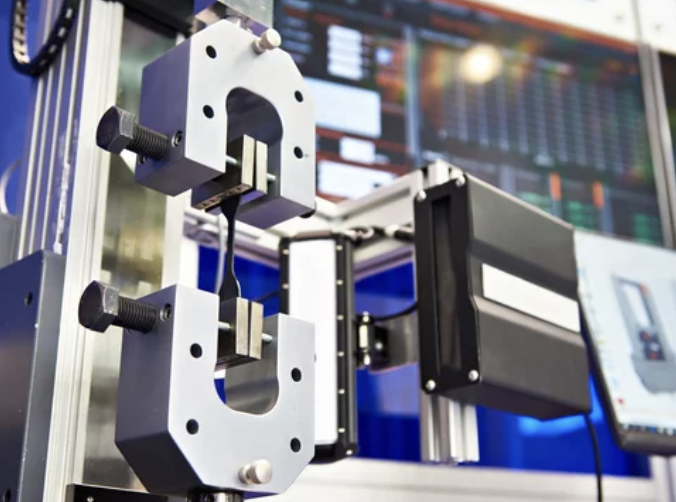
Metal testing laboratories are specialized facilities equipped to assess metallic materials’ properties and performance. These laboratories conduct different types of tests to evaluate aspects such as tensile strength, hardness, chemical composition, and microstructural characteristics, making sure that materials meet industry standards and are suitable for their intended applications.
While setting up a metal testing laboratory may seem complex and costly, it is a manageable endeavor with proper planning and resource allocation. By systematically addressing key components—such as equipment acquisition, compliance with regulations, and staff training—you can create an efficient and cost-effective in-house testing facility customized to your specific needs.
4 Steps to Setting Up Your Own Metal Testing Lab
Despite the fact that setting up an in-house metal testing laboratory involves many tasks, these can be effectively consolidated into 4 main steps, which are as follows:
1. Plan and Verify Compliance
Thorough planning and compliance with regulations are foundational to a successful laboratory setup. Begin by clearly defining your laboratory’s purpose. Determine the types of metals you will test and the specific analyses you will perform, such as tensile strength, hardness, or chemical composition assessments. Understanding your objectives will guide equipment and staffing decisions.
Conduct a comprehensive market analysis to assess the demand for metal testing services in your industry and region. Identify potential clients, understand their needs, and evaluate the competition. This analysis will inform your service offerings and pricing strategies.
Create a detailed business plan that outlines your laboratory’s goals, budget, and operational strategies. Include financial projections, funding sources, and a marketing plan. A well-structured business plan serves as a roadmap and is essential for financing.
Make sure your laboratory complies with all relevant legal and environmental regulations. Obtain the necessary licenses and permits, and meet the standards set by regulatory bodies such as the Occupational Safety and Health Administration (OSHA). Implement environmental controls to manage waste and emissions responsibly.
2. Acquire the Required Equipment
Selecting the right equipment is the key to accurate and reliable testing. Invest in quality testing instruments, including hardness testers, spectrometers, microscopes, etc. These tools are fundamental for assessing the different material properties, along with specialized equipment such as universal testing machines for mechanical tests, metallography sample preparation tools, and pendulum impact testers like Charpy and Izod systems.
Prioritize quality over cost when selecting equipment. High-quality instruments provide precise results and have a longer lifespan, reducing long-term expenses. Consider equipment that meets industry standards and has a proven reliability track record, such as portable and bench-top hardness testers or consumables like tensile test grips and metallography supplies.
In addition to primary testing instruments, acquire sample preparation tools, calibration devices, and safety equipment. Proper sample preparation is vital for accurate testing, and regular calibration provides ongoing precision. Safety equipment, such as fume hoods and protective gear, is a necessary component for maintaining a safe working environment.
3. Design Your Laboratory and Build a Team
Efficiency and qualified personnel are integral to effective laboratory operations. Design your laboratory layout to optimize workflow and maximize safety. Arrange equipment logically to facilitate smooth sample and personnel movement. Incorporate safety measures such as emergency exits, proper ventilation, and adequate lighting. Consulting with experts in laboratory design can provide valuable insights into creating an efficient workspace.
Hire qualified professionals, including metallurgists, lab technicians, and support staff. Look for individuals with relevant experience and certifications. For example, certifications from organizations like the American Society for Nondestructive Testing (ASNT) can be beneficial. Be sure that your team can operate equipment, conduct tests, and interpret results accurately.
Implement ongoing training programs to keep staff updated on industry advancements and best practices. Encourage continuous professional development and provide opportunities for certification and skill enhancement. A well-trained team contributes to laboratory reliability and credibility.
4. Implement Quality Management Systems
Maintaining high standards is a prerequisite for your metal testing laboratory’s long-term success. Develop comprehensive Standard Operating Procedures (SOPs) for all testing processes to guarantee consistency and accuracy. Clearly documented procedures help maintain quality and facilitate new staff training. Regularly review and update SOPs to reflect changes in standards or methodologies.
Pursue accreditation from recognized bodies, such as ISO/IEC 17025, which specifies general requirements for testing and calibration laboratories’ competence. Accreditation enhances your laboratory’s credibility and demonstrates quality.
Implement a Laboratory Information Management System (LIMS) to efficiently manage data, track samples, and generate reports. A robust LIMS enhances data integrity, facilitates compliance, and improves operational efficiency.
By focusing on these quality management practices, your laboratory will consistently produce reliable results, supporting your organization’s objectives and maintaining high standards.
An Example of Reliable Metal Testing Equipment
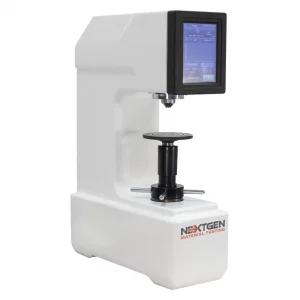 As a trusted supplier to material testing laboratories across the North American continent, we provide a comprehensive range of solutions customized to diverse industry needs. Among our offerings is the Universal Hardness Tester for Vickers, Rockwell, and Brinell scales—a prime example of advanced testing technology.
This high-performance system delivers precision and adaptability for labs requiring comprehensive hardness testing. It supports the Vickers, Rockwell, and Brinell methods, with a large touchscreen LCD interface for user-friendly operation. The closed-loop system eliminates traditional weights, providing consistent force application with unmatched accuracy. Automated test force correction and curvature radius adjustments meet stringent standards, including ISO 6508, ASTM E-18, and ISO 6506.
Designed for practicality, this tester includes modular components for easy maintenance and data export capabilities compatible with Excel, simplifying data analysis, and record-keeping. It comes fully equipped with NIST-certified consumables, making it a complete turnkey solution.
While this is just one example from our extensive catalog, it reflects our dedication to innovative, reliable equipment. Whether for building labs or upgrading facilities, we offer the tools to meet evolving testing demands with precision and efficiency, backed by decades of expertise in material testing solutions.
Build Your Laboratory, Build Your Future
Setting up your own metal testing laboratory is a significant step toward cost-efficiency, operational control, and superior reliability. By following the 4 steps outlined above—planning and compliance, acquiring the right equipment, designing your lab, and implementing quality management systems—you can create a robust facility adapted to your specific needs.
With the ability to perform high-volume and customized tests in-house, your laboratory will reduce dependency on external services, save costs, and achieve faster, more precise results. Whether you’re focused on improving product quality or meeting strict industry standards, an in-house lab is a strategic investment in your business’s success.
At NextGen, we are here to help you choose the right equipment for your laboratory needs. From comprehensive catalogs to expert advice, we offer everything you need to set up a state-of-the-art metal testing facility. Explore our website to discover more about our extensive selection of testing solutions, or contact us directly to discuss your specific requirements. You can also request an online quote for personalized recommendations. Whatever your material testing needs are, we are here to support you every step of the way!
 Flexural (Bend) Testing Explained: 3-Point vs 4-Point, Standards, and SetupFlexural (bend) testing explained: what it measures, three-point vs four-point setups, the standards for plastics, metals, composites and concrete, and how to choose the right fixtures and...Read the articleGenTest Software Setup Guide for NextGen NG-EML Universal Testing MachinesGenTest setup affects the full UTM testing workflow: method storage, PC-to-controller communication, user permissions, simulation files, live data acquisition, and report output. This guide follows the GenTest setup video step by step for NextGen NG-EML electromechanical universal testing machines. It covers installation, license activation, workspace configuration, UTM controller connection, safety and peripheral setup, user management, DEMO Mode, simulation files, Control Panel setup, Quick Test, and test method creation. GenTest is the software layer where the test method, machine connection, operator input, live data, calculated results, and report output come together. For operators, service teams, QA/QC labs, and R&D users, the goal is to...Read the articleBrinell, Rockwell, Vickers, or Microhardness: Which Test Makes Sense for Your Application?Choosing a hardness test starts with the part itself. Material type, section thickness, geometry, surface condition, inspection purpose, and required testing speed all affect which method will produce a reliable result. Brinell, Rockwell, Vickers, and microhardness methods work differently, so they are not equally suitable for the same component or the same quality task. Brinell, Vickers, and Knoop are based on the size of an indentation, while Rockwell is based on indentation depth. That difference directly affects how the result is obtained and where the method fits best. In production and lab work, problems usually appear when the test method does not fit the application. A part may be too thin for the selected load, the surface may be too rough...Read the articleSpecimen Size Effects in Charpy Testing: What Engineers Need to KnowCharpy V-notch testing remains widely used because it offers a standardized and efficient way to evaluate impact behavior in metallic materials. In production, qualification, and failure analysis work, it is often used to compare toughness response across temperatures, material conditions, and product forms. The standard Charpy specimen measures 10 × 10 × 55 mm, but that geometry is not always available in practice. Thin sections, weld zones, heat-affected zones, and limited extraction volumes often make full-size specimens impractical. ISO 148-1 addresses this directly by permitting sub-size specimens when a standard specimen cannot be produced, including reduced-thickness options such as 7.5 mm, 5 mm, and 2.5 mm. That change affects more than the...Read the article
Machines Behind This Article
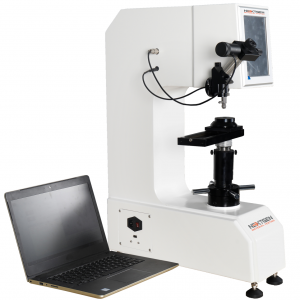 Universal Tester For Vickers / Knoop, Rockwell and BrinellUniGen – Universal Hardness Tester (Rockwell, Vickers, Brinell)UniGen is an all-in-one universal hardness testing system for Rockwell, Vickers, Knoop, and Brinell measurements. Built for accurate, repeatable hardness testing,...View product
 ConsumablesHardness Test Blocks, Indenters and AccessoriesHardness test blocks, indenters, and accessories support daily verification and reliable operation of metal hardness testing systems. The range includes certified...View product