Ceramics stand out for their exceptional properties, including high hardness, thermal stability, and resistance to wear and corrosion. These qualities make ceramics indispensable in many industries, including the electronics, aerospace, automotive, and biomedical industries. The application of ceramics ranges from simple household items like pottery and tiles to complex components such as semiconductor wafers, engine components, and biomedical implants. Ceramics’ inherent characteristics, such as their brittleness and diversity of composition, require careful preparation and testing, however.
Ceramic sample preparation is a critical step in the material science field. Proper specimen preparation is fundamental as it directly impacts the accuracy and reliability of test results. For ceramics, this process involves precise cutting, mounting, grinding, and polishing to obtain a sample that accurately represents the material’s properties. The quality of sample preparation can significantly influence the detection of material defects, the assessment of microstructural features, and the determination of mechanical properties. Therefore, achieving a high-quality specimen surface without altering the material’s original characteristics is crucial for meaningful analytical results.
The purpose of this blog is to provide an in-depth look at the comprehensive process of ceramic sample preparation, focusing on the techniques and best practices essential for preparing samples that yield reliable and accurate test results. Understanding the nuances of ceramic sample preparation not only facilitates the accurate characterization of ceramic materials, but also assists in advancing research, quality control, and the development of novel ceramic-based applications. Through a detailed examination of each step in the sample preparation process, we aim to provide readers with a foundational understanding of the methodologies and considerations critical to the successful preparation of ceramic samples for material testing.
Exploring the Ceramic Essence
To begin, let us shed light on ceramic basics. Ceramics are made up of inorganic, non-metallic materials that are shaped and hardened by heating to high temperatures. Their origins trace back to ancient civilizations, with the term “ceramic” derived from the Ancient Greek word “keramikós,” meaning “of pottery” or “for pottery”. Ceramics creation involves several key steps, starting with the shaping of clay or other ceramic materials, which are then sintered or fired at high temperatures to achieve desired properties such as hardness, brittleness, and heat resistance. This process produces an array of ceramic types, including traditional pottery and advanced ceramics.
Traditional ceramics, like earthenware, stoneware, and porcelain, have been integral to human culture for millennia. Earthenware is known for its coarse texture and is often glazed for aesthetic and functional purposes. Stoneware, fired at higher temperatures, becomes vitrified, making it waterproof and more durable. Porcelain, prized for its translucency and strength, is made from a mixture of kaolin, bone ash, and feldspathic material, fired at even higher temperatures to achieve its characteristic properties.
Advanced ceramics diverge from traditional clay-based materials, using oxides, carbides, nitrides, and other non-oxides to achieve superior properties like high wear resistance, exceptional thermal conductivity, and high strength. Examples include silicon carbide, known for its abrasion resistance, and titanium carbide, which is used in cutting tools and wear-resistant coatings. These advanced materials find applications in various fields, including aerospace, biomedical implants, electronics, and energy, due to their specialized properties.
Ceramic manufacture, whether traditional or advanced, typically involves blending fine powders of the constituent materials, shaping them into a desired form, and then subjecting them to high-temperature firing or sintering. This process allows the individual grains of the ceramic components to fuse together, forming a hard, durable product.
Understanding Ceramic Specimens and Their Testing
Following our exploration of ceramics, their composition, and their types, we turn to ceramic specimens – integral to assessing ceramic materials’ properties and capabilities. Ceramic specimens are typically small, carefully prepared samples of ceramic materials, designed for testing under controlled conditions to understand their mechanical properties and behavior under varying stresses.
Ceramic specimens are created from both traditional and advanced ceramics, specifically designed for specific tests such as tensile, compression, and flexural strength assessments. These specimens can be shaped differently – ranging from prismatic bars for bending tests to round discs for biaxial strength tests – depending on the testing method employed.
Ceramic specimens are created to evaluate the material’s load capacity and strength. Since ceramics are brittle and tend to rupture under mechanical stress without significant plastic deformation, it’s crucial to understand their breaking points. While tensile strength tests are more common in academic settings due to their complexity, flexural strength testing, either by 3-point or 4-point bending tests, is predominantly used in practice.
Specimens can take different shapes, determined largely by the testing technique. For instance, 4-point bending tests may use small prismatic specimens, whereas 3-point bending tests can accommodate both small and large specimens. The breaking load from these tests allows the determination of the material’s flexural strength at room temperature.
Testing ceramic specimens yields valuable data such as the Modulus of Rupture (MOR) and Young’s modulus (MOE), providing insights into the material’s elastic deformation before rupture. Notably, ceramic materials often follow a Weibull distribution rather than a Gaussian distribution, necessitating testing with a significant sample size to accurately assess failure probability.
Main Steps in Ceramic Sample Preparation
Ceramic specimen preparation for testing is complex and demanding, requiring extreme attention to detail at every stage. Unlike working with more forgiving materials, ceramics’ brittle nature and precise measurements make specimen preparation a challenging process. Each step, from the initial selection and cutting to the final cleaning and drying, must be executed with precision to guarantee that the sample accurately represents the material’s properties and behaves as expected under test conditions. This rigorous preparation is fundamental not only for reliable test results but also for understanding ceramic behavior in its intended application.
In the following sections, we will discuss each step of the ceramic sample preparation process, elucidating the methods and considerations that guarantee the integrity and usefulness of the specimens tested. Also as a company specializing in material testing and manufacturing high-quality equipment in this field, it would be appropriate to offer you our products, which can help you with the different steps in preparing ceramic samples.
Step 1: Material Selection
Preparation of ceramic specimens for testing begins with material selection. It involves choosing the right material that accurately represents the batch or piece intended for testing. This decision is extremely important as the properties of the ceramic specimen – such as hardness, brittleness, and thermal resistance – largely depend on the material’s composition and the atomic structure that dictates these characteristics.
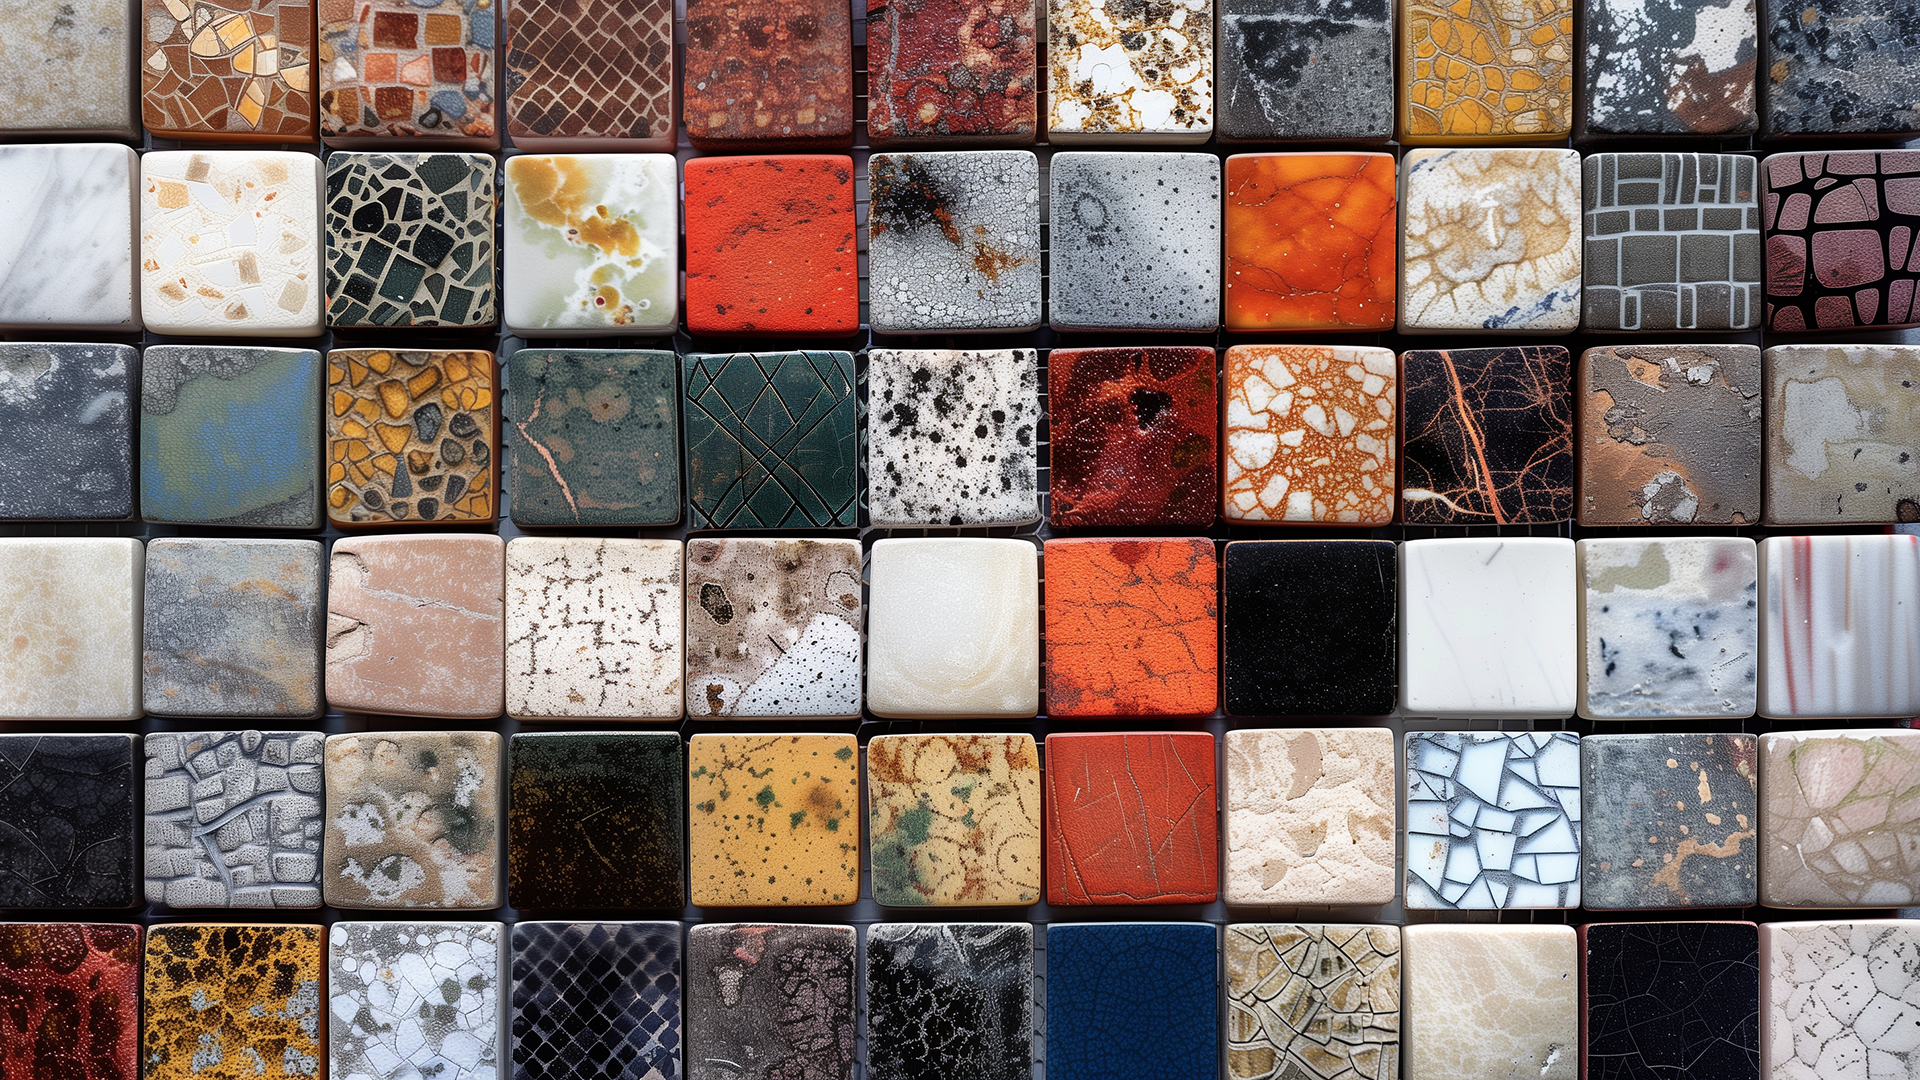
Ceramics come in dozens of types, each suited to different applications and exhibiting distinct properties. Traditional ceramics, like earthenware, stoneware, and porcelain, are made from natural materials such as clay, feldspar, and quartz. Porcelain, for instance, known for its strength, durability, and translucency, is made from kaolin clay. It is often used for fine dinnerware and art objects. On the other hand, earthenware offers a more rustic appearance and is commonly used for decorative items and cookware.
Advanced ceramics include materials such as silicon carbide, known for its exceptional wear resistance and thermal conductivity, making it ideal for cutting tools and abrasives. Tungsten carbide, another advanced ceramic, maintains its properties at high temperatures and is used in applications requiring extreme durability. Bone china, a variant of porcelain that incorporates bone ash, is renowned for its chip resistance and elegance, making it a favored material for high-quality dinnerware.
Selecting the appropriate ceramic type for specimen preparation requires an understanding of the intended testing application. For instance, if thermal shock resistance or leachability is of interest, silica-based ceramics might be selected for their remarkable performance under such conditions. In applications requiring high thermal conductivity, diamonds or certain types of graphite, although not traditional ceramics, could be considered due to their exceptional properties.
Step 2: Cutting and Sectioning
Following the selection of the appropriate ceramic material for testing, the next step is cutting and sectioning. This process involves using precise tools and methods to form the specimen to the required size and shape without introducing any stress or altering its inherent properties. This is done to verify that the specimen reflects the material’s true characteristics during testing.
For ceramics, which are inherently dense and brittle, the cutting process demands specialized equipment to prevent damage. Diamond cut-off wheels are commonly employed to cut through tough materials cleanly and efficiently. The choice of cutting tool depends on ceramic hardness and precision. Silicon carbide cut-off wheels may also be used, particularly for less hard ceramics.
Specimen types differ greatly and are chosen based on the testing method to be used. Common forms include thin sections for microscopic examination, polished thin sections for more detailed surface analysis, thick sections for reflected light or electron microscopy, and polished blocks or mounts for general examination. Each specimen type has its own surface finish and thickness requirements, designed to facilitate accurate and insightful analysis.
Cutting a specimen typically involves reducing a large piece of material down to a manageable size, for example, 20 x 30 x 8.0 mm. This is followed by grinding or lapping to achieve complete planeness. For certain analyses, the specimen may be attached to a glass slide for stability and ease of handling, especially when thin sections are required. The final thickness is carefully controlled through successive grinding and polishing steps. This culminates in a specimen ready for the next preparation stage or direct analysis.
Ceramic Sample Cutting Equipment
We offer a range of precision metallographic cutting equipment developed to effectively manage ceramic specimen cutting. One of the most popular models in this line is the GenCut GL100M – Precision Manual Metallographic Sample Cutting Machine. This machine is crafted with great attention to detail and durability. It features a secure, closed structure with a large observation window that increases operator safety while allowing clear visibility during operation.
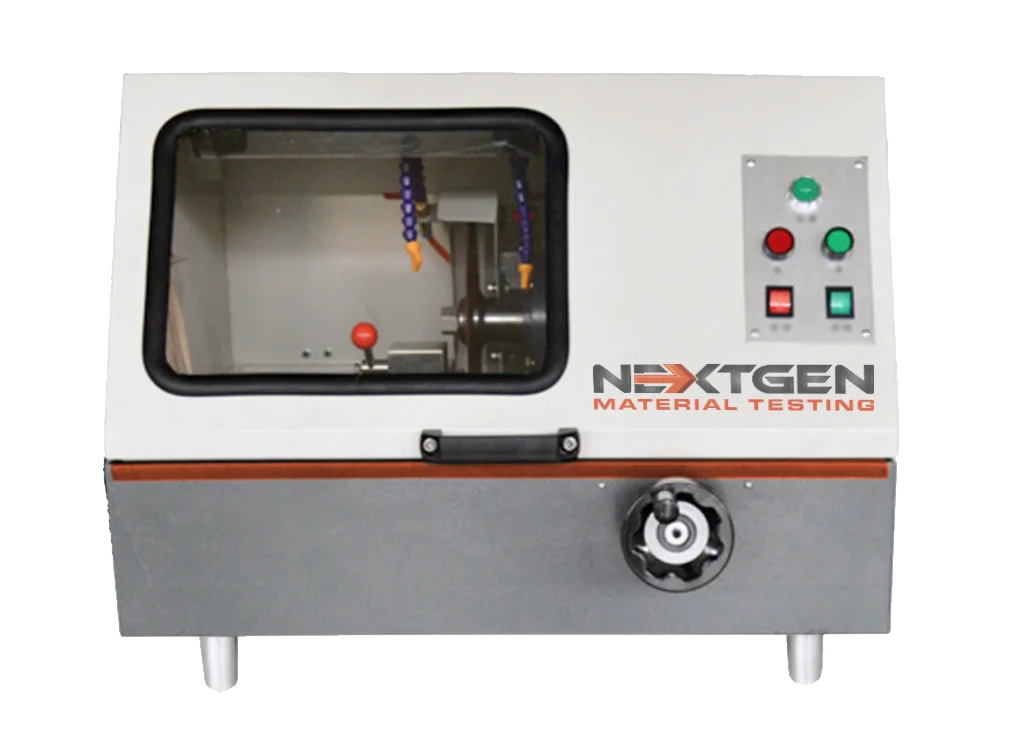
The GenCut GL100M is equipped with a swift clamping mechanism that simplifies the process of securing samples, making it both quick and reliable. This is particularly advantageous when handling brittle ceramic materials that require precise positioning without additional stress. The machine also incorporates a dedicated cooling water tank designed to circulate cooling liquid efficiently, maintaining ceramic samples’ integrity as they are cut.
Constructed with stainless materials for the jaw and work surface, the GenCut GL100M ensures a long service life and resistance to wear and tear. It also features a handwheel for Y-axis control, which allows smooth and precise sample position adjustments. This level of control is superior to that offered by typical slot machine-type manual cutting machines, providing operators with the enhanced ability to manage sample movement accurately during the cutting process.
Step 3: Mounting
After the ceramic specimen has been carefully cut and sectioned, mounting is the next step in specimen preparation. Mounting stabilizes the specimen, making it easier to handle during the further preparation and testing phases. This process is particularly important for specimens that are too small, fragile or have irregular shapes that make them difficult to work with directly.
Mounting involves embedding the ceramic specimen into a mounting medium, which is then hardened. There are two primary mounting techniques: cold mounting and hot mounting.
-
Cold Mounting: This technique involves embedding the specimen in a liquid resin that hardens at room temperature. Cold mounting is preferable for specimens sensitive to heat or those affected by hot mounting temperatures. It’s a gentle method that minimizes the risk of altering specimen properties.
-
Hot Mounting: Hot mounting, on the other hand, uses heat and pressure to embed the specimen in a thermosetting resin or thermoplastic. This method is faster than cold mounting and suitable for an array of materials, providing robust mounts that facilitate easy handling and processing of specimens.
Each mounting technique has its unique advantages. The choice between them depends on the specific requirements of the ceramic material being prepared and the analysis to follow. For instance, ceramics that are highly porous or have a significant variation in hardness within the specimen might benefit from specific considerations during the mounting process.
Additionally, the mounting medium chosen can also have a significant impact on preparation quality. For example, certain resins provide better edge retention, which is critical for maintaining specimen geometry during grinding and polishing.
Once the specimen is mounted, it can be processed further, involving grinding, polishing, and eventually analyzed to reveal the material’s microstructure and properties.
Mounting Tools for Ceramic Specimens
A category of mounting press systems for metallography is also part of what we offer in a wide selection of equipment. One of the examples is the GenPress MFA Dual HYD – Fully Automatic Dual Hydraulic Mounting Press.
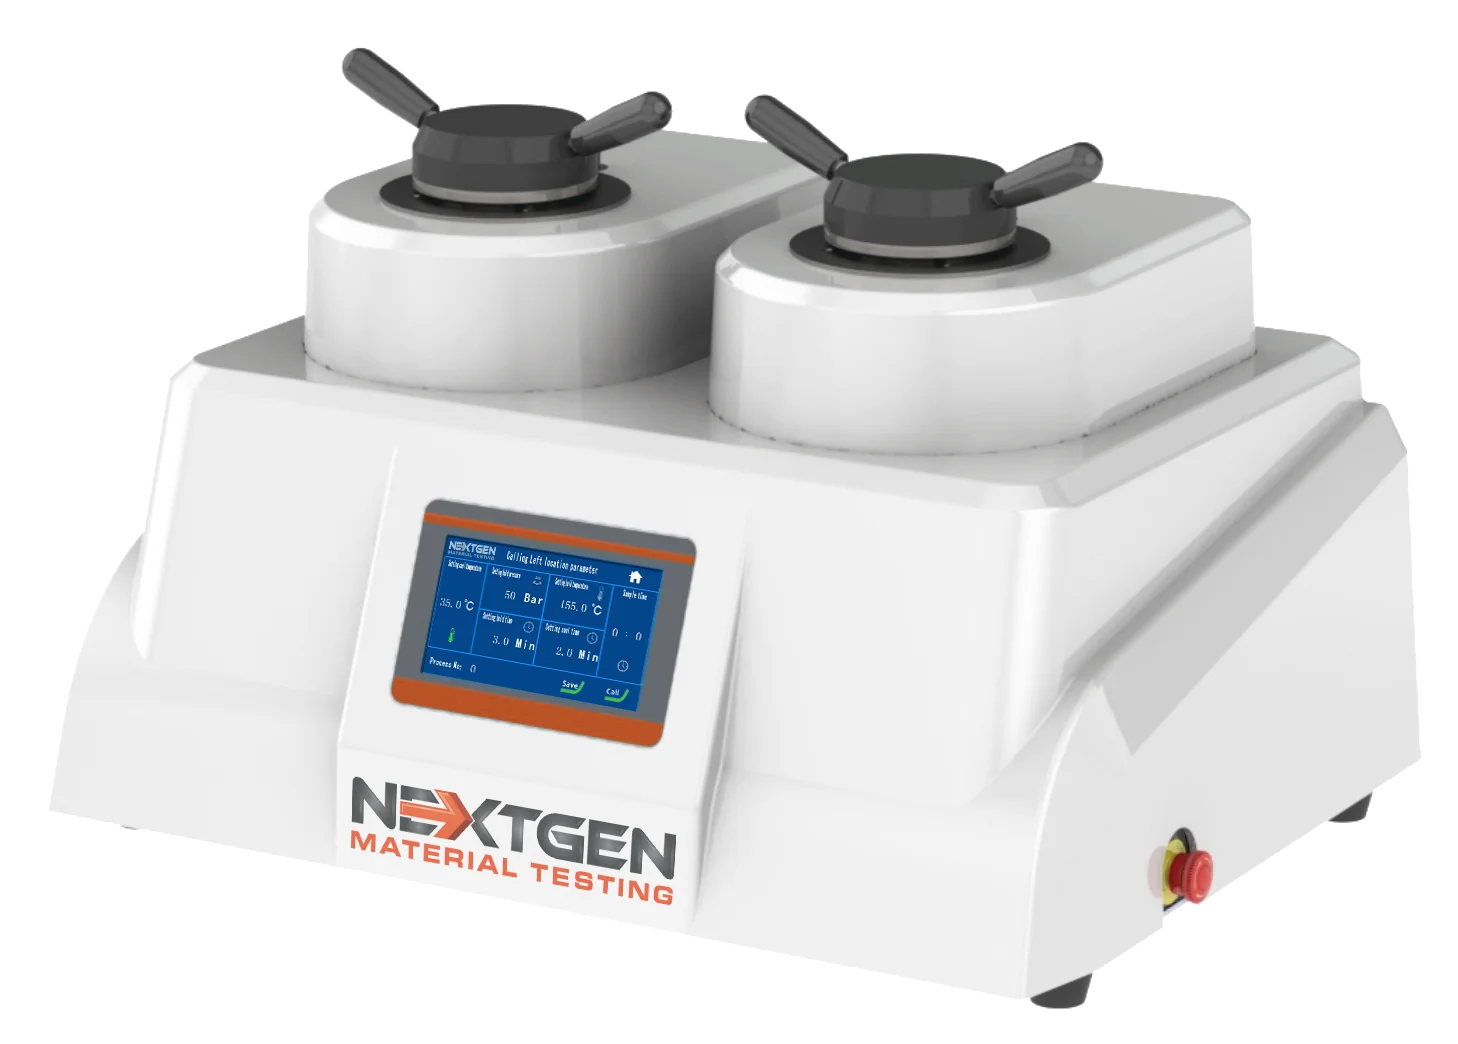
This product is a highly advanced automatic mounting press designed for compression mounting material samples in metallography. It features a 7-inch touchscreen controller that allows for the adjustment and saving of heating, cooling, and timing parameters. The GenPress MFA Dual HYD can store up to 100 operator-created programs, which can be easily selected and repeated. This fully automatic metallographic mounting press system allows the operator to engage in other laboratory tasks during the cycle and emits an alarm upon completion.
The MFA Dual HYD mounting press includes an integrated motorized system to apply the necessary compression for creating high-quality samples. This unit is conveniently sized to fit in any laboratory or production setting. It offers a number of sample sizes, including 1”, 1.25″, 1.5″, 1.75”, 2″, as well as 25mm, 30mm, 40mm, and 50mm. With optional sample spacers, the MFA series can prepare one to two mounted samples in a single cycle. This cutting-edge automatic mounting press is a cost-effective solution for fully automatic metallography mounting presses.
Step 4: Grinding
Grinding takes place during the preparation of ceramic specimens, aiming to remove any surface irregularities, level the specimen, and prepare it for polishing. This procedure is necessary for minimizing damage and ensuring a smooth surface conducive to microstructural analysis.
The grinding process typically begins with coarse grinding, which involves the use of fixed abrasive particles to chip away material from the specimen. This initial stage aims to make the entire surface uniform, flattening any raised areas to match the rest of the specimen’s surface as closely as possible. Common abrasives used during this stage include aluminum oxide and silicon carbide, which are selected based on the ceramic’s hardness and the desired outcome.
Following coarse grinding, fine grinding is performed to further reduce surface roughness and prepare the specimen for polishing. This stage requires careful inspection, often with a light microscope, to ensure that all damage from the previous stages is completely removed. Successive abrasive grits are used to achieve a finer surface finish, preparing the specimen for the final polishing stage.
Grinding Systems for Ceramic Specimens
One of our best-selling products in the category of grinding and polishing equipment is the GenGrind N Series – Advanced Metallographic Grinder & Polisher.
Available in 8″, 10″, or 12″ diameter versions with options for both single and dual wheels, the GenGrind N Series is designed to suit different types of laboratory setups. It is equipped with a user-friendly 7” touch screen that offers an intuitive menu structure, facilitating straightforward operation and smooth transitions between different grinding and polishing tasks.
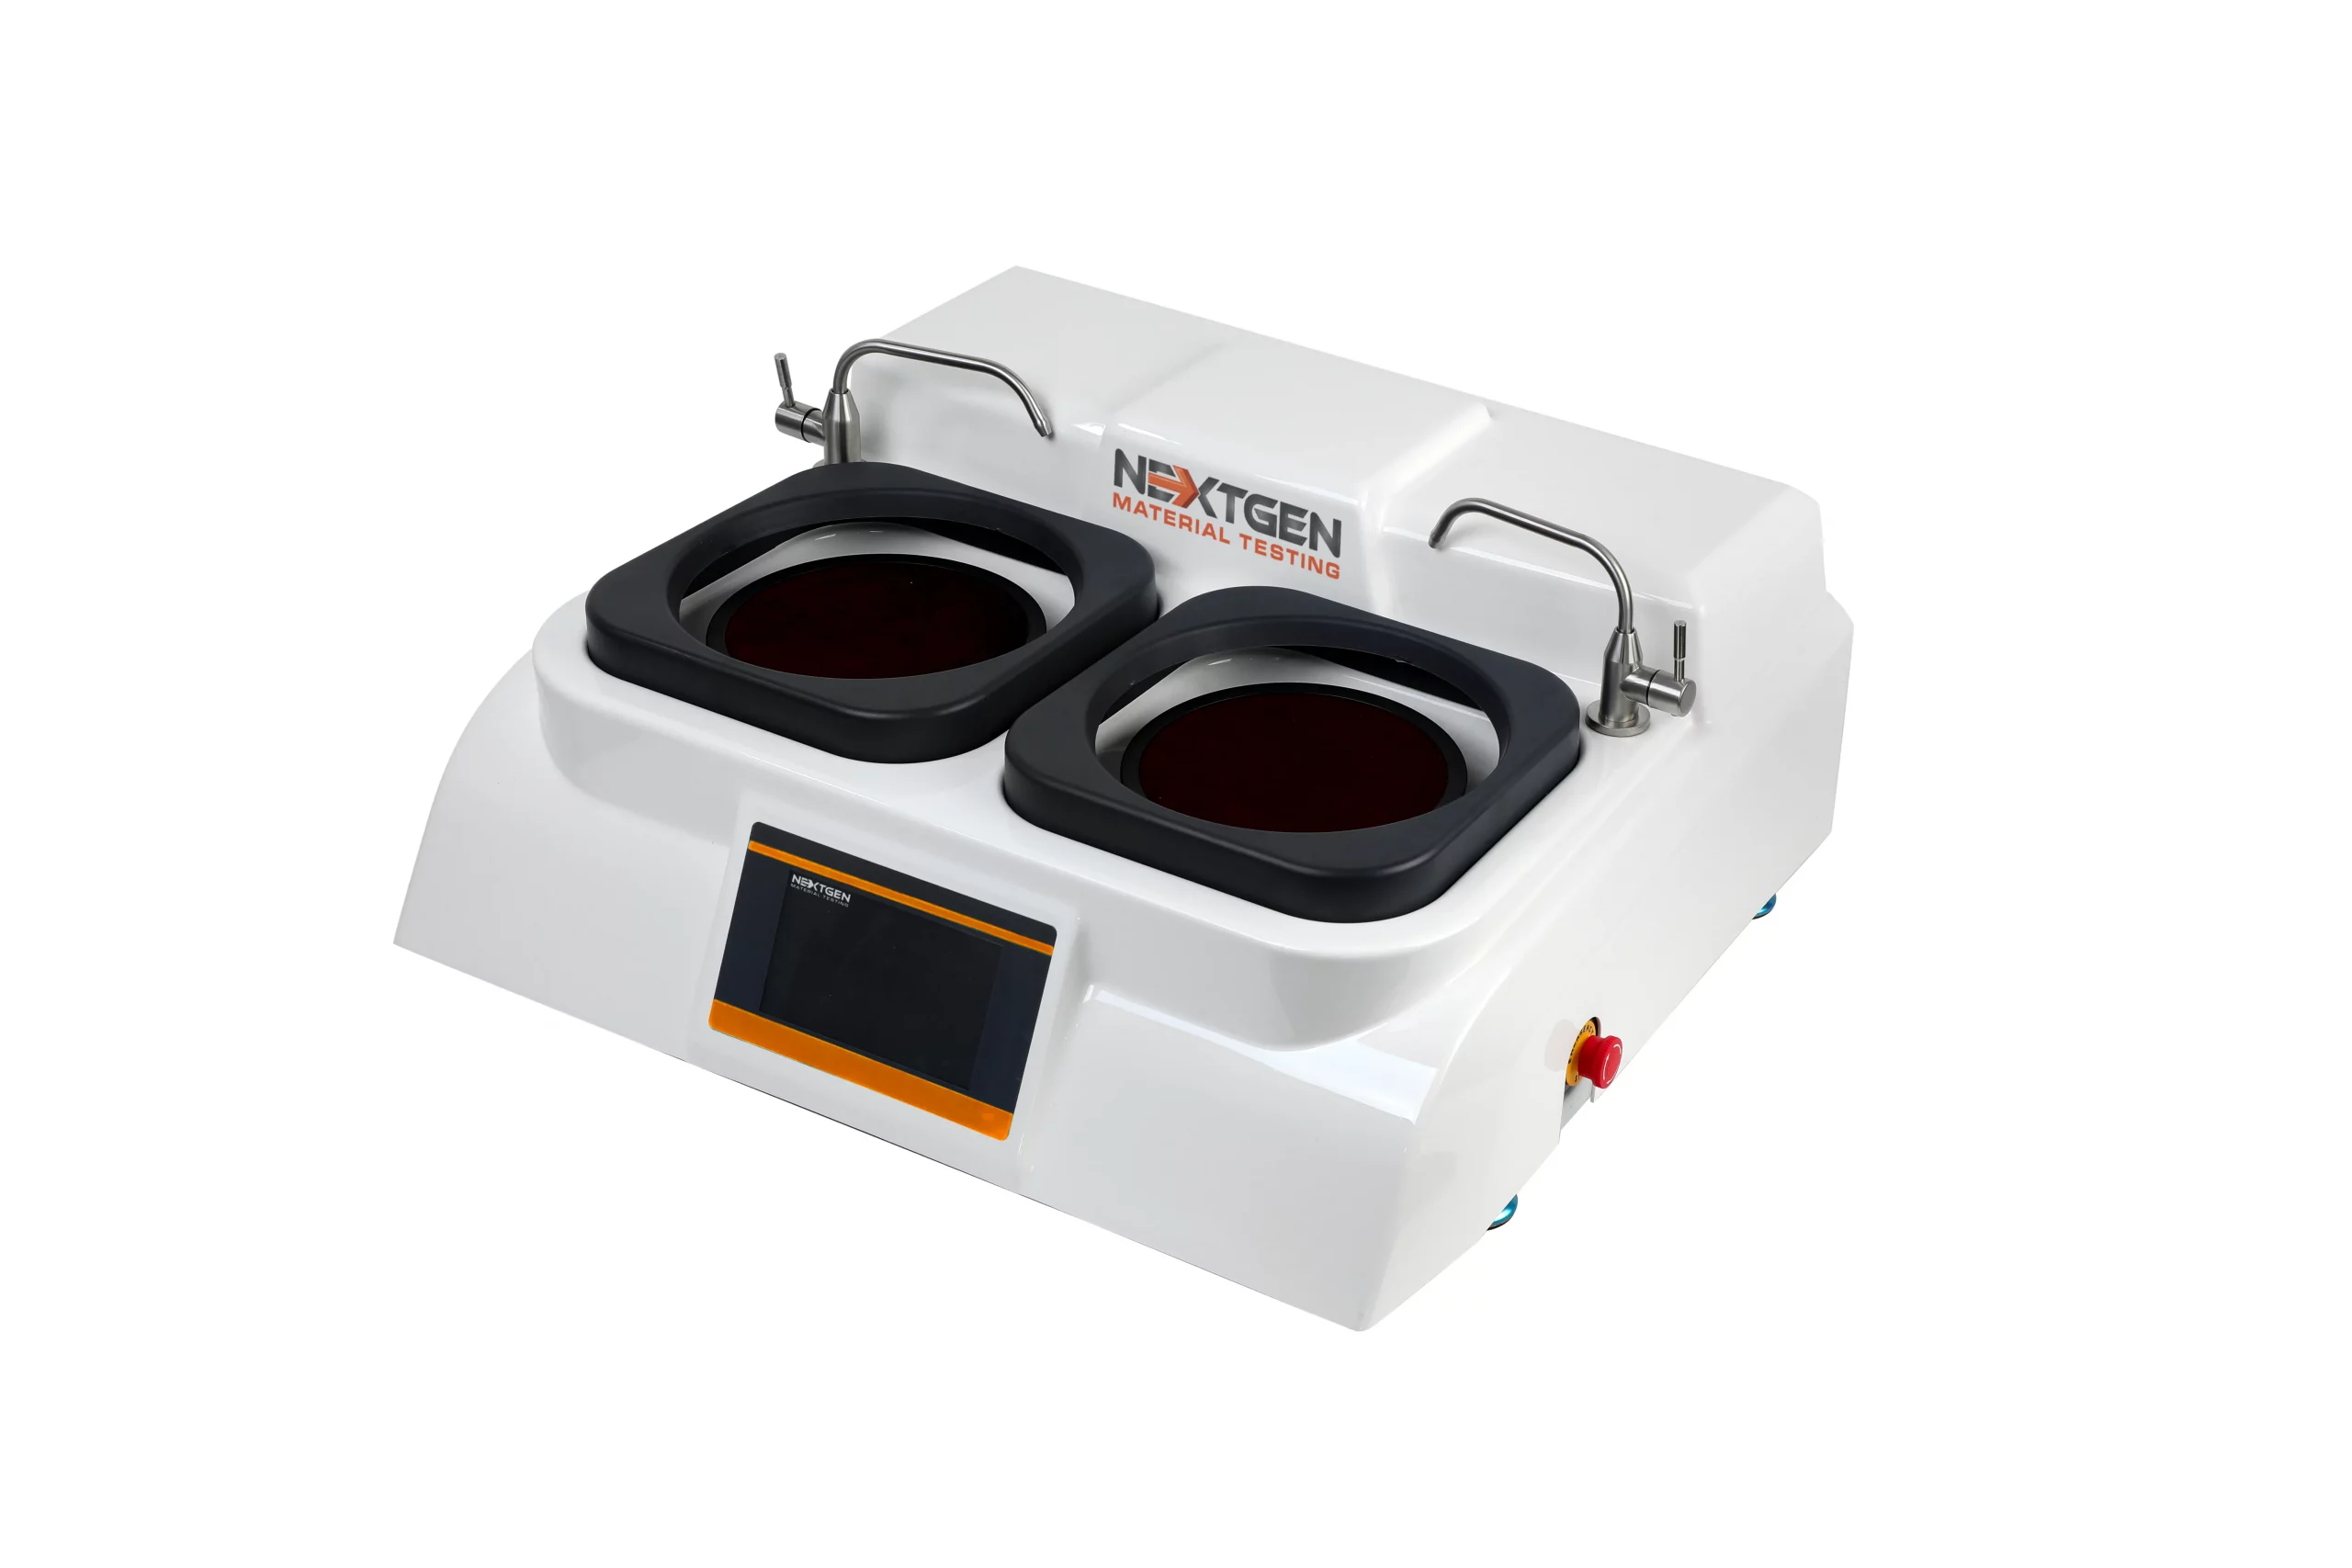
GenGrind N Series’ versatility is one of its standout features. It handles coarse grinding, fine grinding, and both coarse and fine polishing of metallographic specimens – all within one machine. This machine offers adjustable speeds ranging from 50 to 1000rpm, complemented by an easy-to-use constant speed design.
Additional features include manual magnetic anti-sticking disc replacement, which allows for diverse coarse and fine grinding and polishing processes. This feature is available as an optional purchase. The grinder and polisher also support both counterclockwise and clockwise rotating directions, accommodating different procedural needs.
The GenGrind N Series offers low noise levels and stable performance and also features an appealing aesthetic. A high-end ABS shell and corrosion-resistant stainless steel 304 material make up the design of the faucet.
Step 5: Polishing
Polishing is the next procedure in ceramic specimen preparation, aimed at achieving the mirror-like finish required for detailed microscopic examination. This process not only removes the artifacts left from grinding but also ensures the integrity of the specimen’s surface, allowing for the observation of the true microstructure essential for both qualitative and quantitative analysis.
The process of creating a perfectly smooth and deformation-free surface involves the use of successively finer abrasive particles. These particles, often in the form of flaky powders of varying fineness, are applied to the specimen surface using a mixture of powder and water over a rotating disc. This disc is usually covered with a polishing cloth that evenly distributes abrasive particles across the specimen’s surface. The careful selection of abrasive materials, including diamonds known for their extreme hardness and efficiency in cutting through all materials, plays a pivotal role in this step. Silicon carbide and aluminum oxide are also frequently used for their respective qualities suitable for different specimen materials.
A significant aspect of the polishing process is the application of lubricants, which vary depending on the specimen’s material and the stage of preparation. These lubricants help balance the levels of lubrication and cooling, catering to the specific needs of the specimen being prepared. For instance, soft materials demand high amounts of lubricant to prevent damage, whereas hard materials may require less lubricant but a higher amount of abrasives due to faster wear. It’s imperative to maintain the polishing cloth in a moist condition – neither too dry nor overly wet – to optimize the removal rate and achieve the desired finish.
Step 6: Cleaning
The often overlooked step in ceramic specimen preparation is cleaning. After specimens undergo grinding and polishing, it is very important to remove any residual debris, lubricants, or abrasive particles. This is necessary to prevent contamination during subsequent testing or microscopic examination so that the true microstructure of the material is accurately represented.
Cleaning involves washing specimens to remove all traces of substances that could mask or alter the specimen’s surface. This step often employs a combination of solvents and techniques specific to the specimen’s material and the substances used in prior preparation steps. For ceramic specimens, which may be porous or have micro-cracks, special attention is paid to guarantee thorough cleaning without damaging the specimen.
One approach includes swabbing the specimen with a liquid detergent solution. This is followed by rinsing in warm water, then with ethanol, and finally drying in a stream of warm air. This sequence effectively removes both water-soluble and insoluble residues, with alcohol serving as a drying agent to prevent water spots. Ultrasonic cleaning is another effective method, especially for specimens with intricate microstructures or those prone to harboring residual particles in crevices. This technique uses high-frequency sound waves to agitate the cleaning fluid, dislodging contaminants from the specimen’s surface.
Regardless of the specific methods used, the overarching goal is to achieve a specimen surface that is as free of contaminants as possible. This not only facilitates accurate testing and analysis but also helps preserve the integrity of the polishing cloths and grinding disks by minimizing the carryover of abrasive particles and other materials that could cause premature wear or contamination of other specimens.

Step 7: Drying
The final step of ceramic specimen preparation hinges on the drying process, a step that demands careful execution to prevent any moisture-related impact on testing accuracy. Post-cleaning, specimens require thorough drying to eliminate residue from the grinding and polishing phases. It’s recommended to avoid direct compressed air for drying, as it might contain contaminants. A gentle, yet effective approach involves using a clean, dry environment or a dedicated specimen dryer that applies warm air gently to the specimen’s surface.
This method makes sure that the ceramic material’s integrity is preserved, free from any adverse effects of moisture, thus maintaining its true characteristics for precise testing and analysis. Proper drying not only readies the specimen for examination but also safeguards against the introduction of new variables that could skew results, making it a key component in the preparation process.
Conclusions on Ceramic Sample Preparation
Our exploration through ceramic sample preparation underscores its significance in material science. From the exploration of ceramics’ inherent properties to the detailed steps necessary for preparing a specimen for testing, the narrative highlights the precision required at every phase. Through the process of synthesizing the information, we have navigated the complexities associated with material selection, cutting, sectioning, mounting, grinding, polishing, cleaning, and drying. Each step makes certain that ceramic specimens accurately reflect the properties of their materials, enabling reliable testing and groundbreaking advances in ceramic technology.
At NextGen Material Testing Inc., our team is dedicated to empowering your material testing endeavors with state-of-the-art equipment and services. Our commitment to advancing research and quality control in ceramics and beyond is unwavering. For any inquiries regarding the process of preparing ceramic samples or to receive a consultation, you can request an online quote. Let us help you navigate the complexities of material testing, which will help your projects achieve precision and excellence.