
If you’ve worked with hardness testing, you’ve likely come across the terms “microhardness” and “macrohardness.” They show up in datasheets, testing specs, and lab reports. Still, it’s not always clear what separates the two — or when one is better than the other.
Both belong to a broader category known as indentation hardness testing, a method used to assess how materials respond to pressure from a sharp or rounded object. Microhardness and macrohardness approaches were developed to deal with very different scales and sample types, from polished coatings to structural steel. At first glance, the difference seems simple. But there’s more to it than load size or indent depth.
This article breaks down what micro- and macrohardness testing actually measure, how each method works, and why the difference matters. Whether you’re testing thin coatings or solid steel blocks, knowing which approach to use can save time, reduce error, and give you better data.
What Is Hardness Testing
Before we compare microhardness and macrohardness methods, it helps to start with the basics — what hardness testing actually means.
In simple terms, hardness testing shows how resistant a material is to being permanently deformed. In most cases, this is done by pressing a small, hard object, called an indenter, into the surface under a known force and measuring the size or depth of the mark it leaves. The smaller the mark, the harder the material.
Hardness itself is not a single, fixed property. Instead, it reflects how a material behaves under load, linking directly to strength, wear resistance, and ductility. For example, a high-hardness steel will better resist scratching and deformation, which is why it’s used for gears, bearings, or cutting tools. Softer metals, on the other hand, can absorb more impact but wear out faster.
This type of testing has been part of materials science for more than two hundred years. It remains one of the fastest and most practical ways to check if a metal, plastic, or coating meets its required performance level. Manufacturers rely on it every day to verify heat treatment quality, detect surface issues, or confirm that a batch meets production standards.
There are several main hardness testing methods:
- Rockwell testing measures how deep the indenter goes under load and gives an instant numeric result, making it common in production environments.
- Brinell uses a large steel or tungsten ball under a heavy force to test coarse or uneven materials like cast iron.
- Vickers applies a diamond pyramid and measures the indent optically, which makes it flexible for almost any solid material.
- Knoop uses a long, narrow diamond shape and is ideal for fragile materials or thin layers that could crack under higher pressure.
What Is Microhardness Testing
Let’s start our overview with microhardness testing, the smaller-scale method in the hardness family.
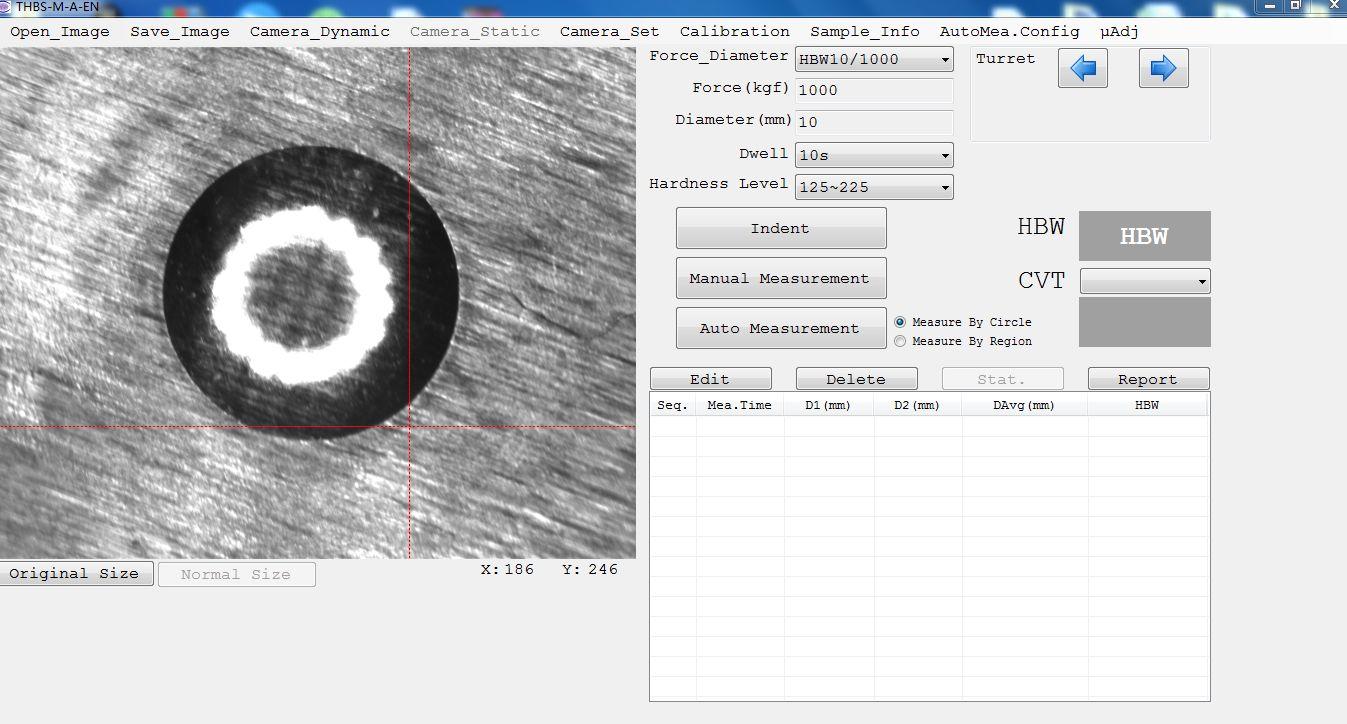
Microhardness testing measures how resistant a material is to indentation when very small forces are applied, typically 1 kilogram-force or less. The process uses tiny diamond tips, often Vickers or Knoop indenters, pressed into a polished sample under controlled load. The resulting mark is measured under a microscope to determine hardness. Because the indentation is microscopic, this test is ideal for evaluating thin coatings, surface layers, or fine structures where a standard test would be too large or destructive.
The Vickers and Knoop methods are the ones that are used the most. Vickers creates a square-shaped mark and works well across a range of materials. Knoop, with its long, narrow diamond, is used for brittle or thin samples, such as ceramics, glass, or coatings, where deeper penetration could cause cracks.
Microhardness testing is widely used in research and manufacturing. It helps engineers analyze case-hardened layers, verify coating uniformity, or measure the hardness of individual grains in metals and alloys. For instance, in steel, microhardness analysis can distinguish between soft ferrite and hard carbide phases — something macrohardness tests can’t do.
This method has clear advantages. It’s highly precise, minimally destructive, and effective for very small samples. However, it requires perfect surface preparation, steady equipment, and skilled operation. Even a small vibration or rough surface can distort results. Because indents are so small, the process takes time and can involve higher variation between measurements.
At the microscopic scale, hardness results may also vary with load, a known effect where lighter tests show higher hardness values. This happens because a small indent may hit only one hard grain or surface layer instead of the entire structure.
What Is Macrohardness Testing
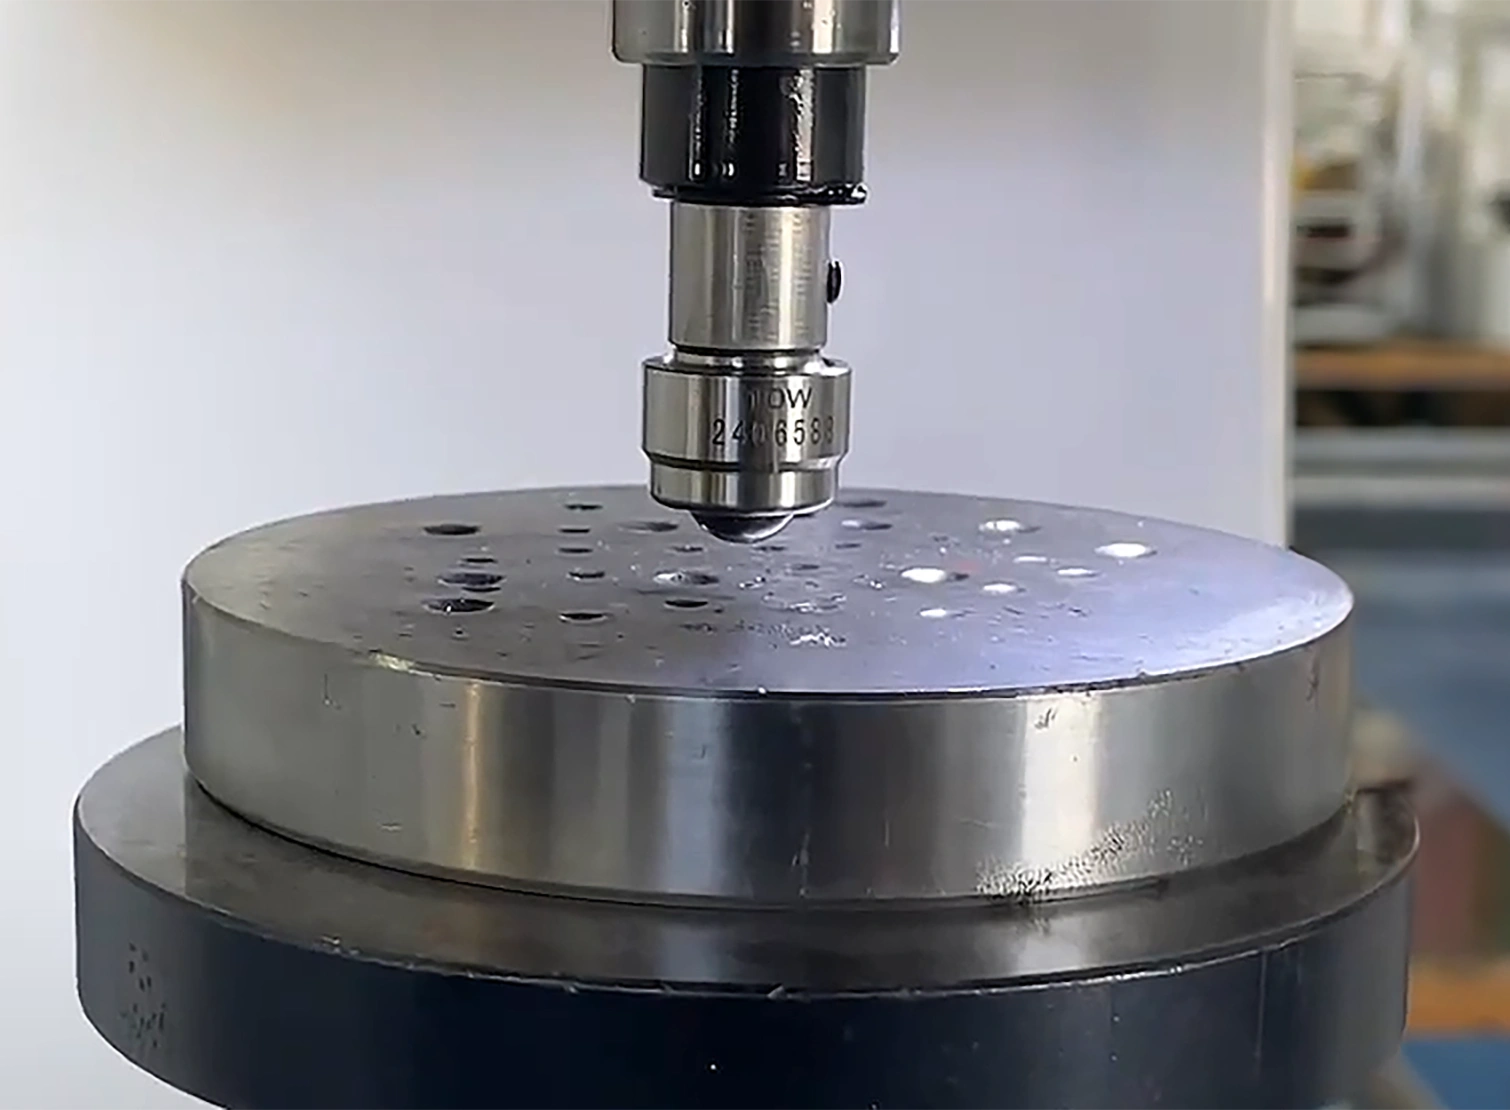
Macrohardness testing deals with higher test loads, usually above 1 kilogram-force, and measures how a material behaves as a whole. Unlike microhardness testing, which focuses on surface layers or small details, macrohardness testing captures the bulk response of the material. It’s the standard choice for larger components, heavy metals, and production-quality checks.
The tests in this group include the Rockwell, Brinell, and high-load Vickers methods. Each follows the same idea: a hard indenter is pressed into the surface under a specific load, and the hardness value is calculated from the depth or size of the impression. The main difference lies in the indenter shape, load range, and how the result is measured.
Rockwell hardness testing is the fastest and most common. It measures the depth of the indentation under load and gives a direct numeric result on a digital or dial display. The test can be completed in seconds, making it ideal for production lines. Rockwell scales differ by indenter type and load — for example, Rockwell C for hardened steel and Rockwell B for softer alloys.
Brinell testing uses a hardened steel or tungsten carbide ball, typically 10 mm in diameter, with heavy loads that can reach up to 3000 kgf. The diameter of the round mark is measured to calculate hardness. Because the indent is large, Brinell testing works well for rough or uneven materials such as cast iron or steel forgings, where smaller indents would be unreliable.
Vickers testing can also operate in the macro range, using heavier loads such as 5–50 kgf. It relies on a diamond pyramid indenter, just like the micro version, but produces a larger and more visible imprint. This version is often used in laboratories when a single, continuous hardness scale is needed for comparison across different materials.
Macrohardness tests are fast, simple, and reliable. Rockwell readings take seconds, and even Brinell or Vickers tests are quick compared to microscopic methods. The results reflect the average hardness of a larger area, which makes them excellent for verifying heat treatments, material grades, or batch consistency. The preparation is also easier: a flat, clean surface is usually enough — no need for mirror polishing.
Still, macrohardness testing has limits. It can’t measure small regions, thin layers, or delicate coatings without damaging them. A large indent might go through a hardened surface into a softer core, giving an inaccurate reading. Also, for very hard materials, a Brinell ball may flatten slightly or leave edges that are hard to measure, so a diamond-based method like Rockwell C or Vickers is preferred.
Microhardness vs. Macrohardness Testing: Key Differences and Comparison
Both micro- and macrohardness testing follow the same basic idea, measuring how a material resists indentation. What changes is the scale, the load, and the purpose. One focuses on fine details, the other on overall strength.
Test Load and Indentation Size
Microhardness testing uses very small loads, often a few grams up to one kilogram-force. The indents are tiny, usually less than 50 micrometers across. Macrohardness testing, in contrast, uses much heavier loads, from a few kilograms to several thousand. The impressions are large enough to see with the naked eye. Micro tests capture what happens inside one grain or a coating layer, while macro tests represent the combined response of the entire material.
Equipment and Measurement
Microhardness tests rely on a microscope for precision. The indent is so small that its diagonal or depth must be measured optically, usually with Vickers or Knoop instruments. Macrohardness machines, like Rockwell or Brinell testers, don’t need such magnification. Rockwell testers show hardness directly on a digital display, while Brinell readings are taken with a simple viewer or camera.
Surface Preparation
Because micro indents are extremely small, surface polish is critical. Samples must be flat, smooth, and often mirror-finished to see the indent edges clearly. Macro testing is far more forgiving. A clean, level surface is enough, and methods like Rockwell can even handle light scratches or machining marks.
Accuracy and Precision
Microhardness provides high spatial accuracy — it can target a single phase or a specific microstructure zone. However, results can vary slightly due to surface imperfections or measurement limits. Macro hardness readings are more repeatable for overall quality control since they average results across many grains. In short, “micro” means detail, and “macro” means consistency.
Representativeness of Results
Macrohardness values reflect the material’s general strength, which makes them ideal for quality checks. Microhardness values, on the other hand, change depending on where the indenter lands — on a hard grain, a soft inclusion, or a surface coating. For example, a steel sample may show higher microhardness under a light load than its macro Rockwell value, simply because the micro test targeted a harder spot.
Indenter Types and Scales
Microhardness testers typically use diamond pyramids — Vickers or Knoop. Macro tests utilize a more diverse set of indenter types: diamond cones, steel balls, or tungsten carbide balls, depending on the method. Rockwell has multiple scales (A, B, C, and others), while Brinell and Vickers specify the load in kilograms-force (for example, HV30 for 30 kgf).
Speed and Efficiency
Macrohardness testing is much faster. A Rockwell test can deliver a result in under 15 seconds. Brinell or macro Vickers takes longer, but still suits production lines. Microhardness testing is slower — each indent must be placed, measured, and recorded with care. That’s why it’s mostly used in laboratories or research, where detail matters more than speed.
When to Use Each
Microhardness is the method of choice for thin coatings, surface layers, or microscopic regions — anywhere precision is more important than coverage. Macrohardness testing is used for full-size parts, bulk materials, and production control. Most laboratories combine both: a macro test for general hardness, and a micro test to analyze the surface or internal structure.
Standards, Best Practices, and Applications in Industry
Understanding micro- and macrohardness testing goes far beyond knowing what they are. In practice, engineers and quality professionals must consider testing standards, sample preparation, data interpretation, and industrial context. These aspects determine how accurate and meaningful a hardness number truly is.
Hardness Testing Standards and Definitions
 Hardness testing is guided by a set of international standards to maintain consistency and comparability across laboratories and industries.
Although modern standards use Newtons (N) for test loads, the kilogram-force (kgf) is still widely referenced in machine settings (1 kgf = 9.81 N). The line between micro- and macrohardness is officially drawn at 1 kgf: loads below this are considered microhardness, while loads above it belong to macrohardness testing.
Key standards include:
- ASTM E18 – Rockwell hardness (macro, 15–150 kgf)
- ASTM E10 – Brinell hardness (macro, 1–3000 kgf)
- ASTM E92 – Vickers hardness in the macro range
- ASTM E384 – Microindentation (Vickers and Knoop up to 1 kgf)
- ISO 6507 – Vickers (micro to macro)
- ISO 6508 – Rockwell
- ISO 6506 – Brinell
- ISO 4545 – Knoop (micro)
- JIS Z2244 – Japanese micro-Vickers
- DIN 50133/50158 – German hardness standards
These documents define how to prepare samples, apply loads, measure indents, and report results. For example, standards specify that a sample must be at least 10× thicker than the indentation depth to avoid substrate effects and that indents should be spaced three diameters apart to prevent work-hardened overlap zones.
Sample Preparation and Common Pitfalls
Hardness testing is only as accurate as the surface you test on. For reliable results, remember the following best practices:
Flatness and Stability: The sample must be level and firmly seated. Even a slight tilt can distort a Rockwell reading or make a Vickers indent asymmetric.
Surface Finish: For macro tests, a ground surface is usually fine. For microhardness, the area must be mirror-polished (down to 1 µm or finer). Rough or oxidized surfaces can hide indent edges or cause cracking.
Cleanliness: Always test on a clean surface: oil, dust, or polishing residue can shift readings dramatically.
Thickness and Edge Distance: Avoid indents too close to the back side or the edge. A rule of thumb: the test area should be at least 2.5–3 indent diameters away from edges.
Dwell Time: Follow the standard dwell time (e.g., 10–15 seconds for Vickers). Too short, and the indent may not fully form; too long, and you risk creep in soft metals.
Calibration: Use certified reference blocks and inspect the indenter regularly. A worn diamond or flat Brinell ball can alter results significantly.
Common mistakes include using the wrong scale, testing rough surfaces, or placing indents too close together. If diagonals differ by more than 5% on a Vickers test, it’s a sign of improper alignment or surface issues.
Hardness Conversions and Microstructure Effects
Different hardness tests use different scales: HV, HK, HRC, HRB, HB, and more.
Standards like ASTM E140 and ISO 18265 provide conversion tables, but these are approximate. Hardness conversion is empirical, not mathematical — two tests can’t always be directly compared because they measure different aspects (indentation depth vs. area, different indenter shapes, and loads).
For example, 22 HRC roughly equals 248 HV, but that depends on the steel grade and microstructure. A microhardness test might show higher values than a Rockwell test because it samples only a hardened layer or a single grain. Macro tests, by contrast, average across multiple grains and often reflect the true bulk hardness.
Grain size, texture, and work hardening can all influence results. A fine-grained steel will show little difference between micro and macro hardness, while a coarse-grained alloy can vary widely. Even surface polishing can slightly harden the outer layer, affecting micro readings.
In short, use hardness conversions as guidelines, not exact equivalences. When accuracy matters, for example, in quality audits or certifications, always test directly on the required scale.
Choosing the Right Method by Industry
Different industries rely on specific hardness testing approaches suited to their materials and workflows.
Automotive: Rockwell C is used for hardened steels (e.g., gears and bearings), while micro-Vickers is used to profile surface hardness in carburized or nitrided parts. Brinell testing is common in foundries for cast iron.
Aerospace: Combines Rockwell or Vickers macro tests for bulk verification and Knoop microhardness for coatings or ceramic layers. Surface integrity and heat treatment validation are key.
Heavy Machinery: Brinell testing dominates due to its ability to handle large, rough components like forgings and castings. Portable Brinell testers are often used in the field.
Manufacturing QC: Rockwell is preferred for speed and simplicity in production lines. Microhardness is used in R&D and failure analysis.
Electronics and Semiconductors: Microhardness is essential for thin metal and ceramic films. Loads as low as 10 gf can characterize coatings without cracking them.
Medical Devices: Combines both methods — Rockwell for overall strength and microhardness for coatings, weld zones, or micro features in implants and tools.
Tooling and Die Making: Rockwell C verifies bulk hardness (~HRC 60), while microhardness ensures correct nitrided or case-hardened layer depth.
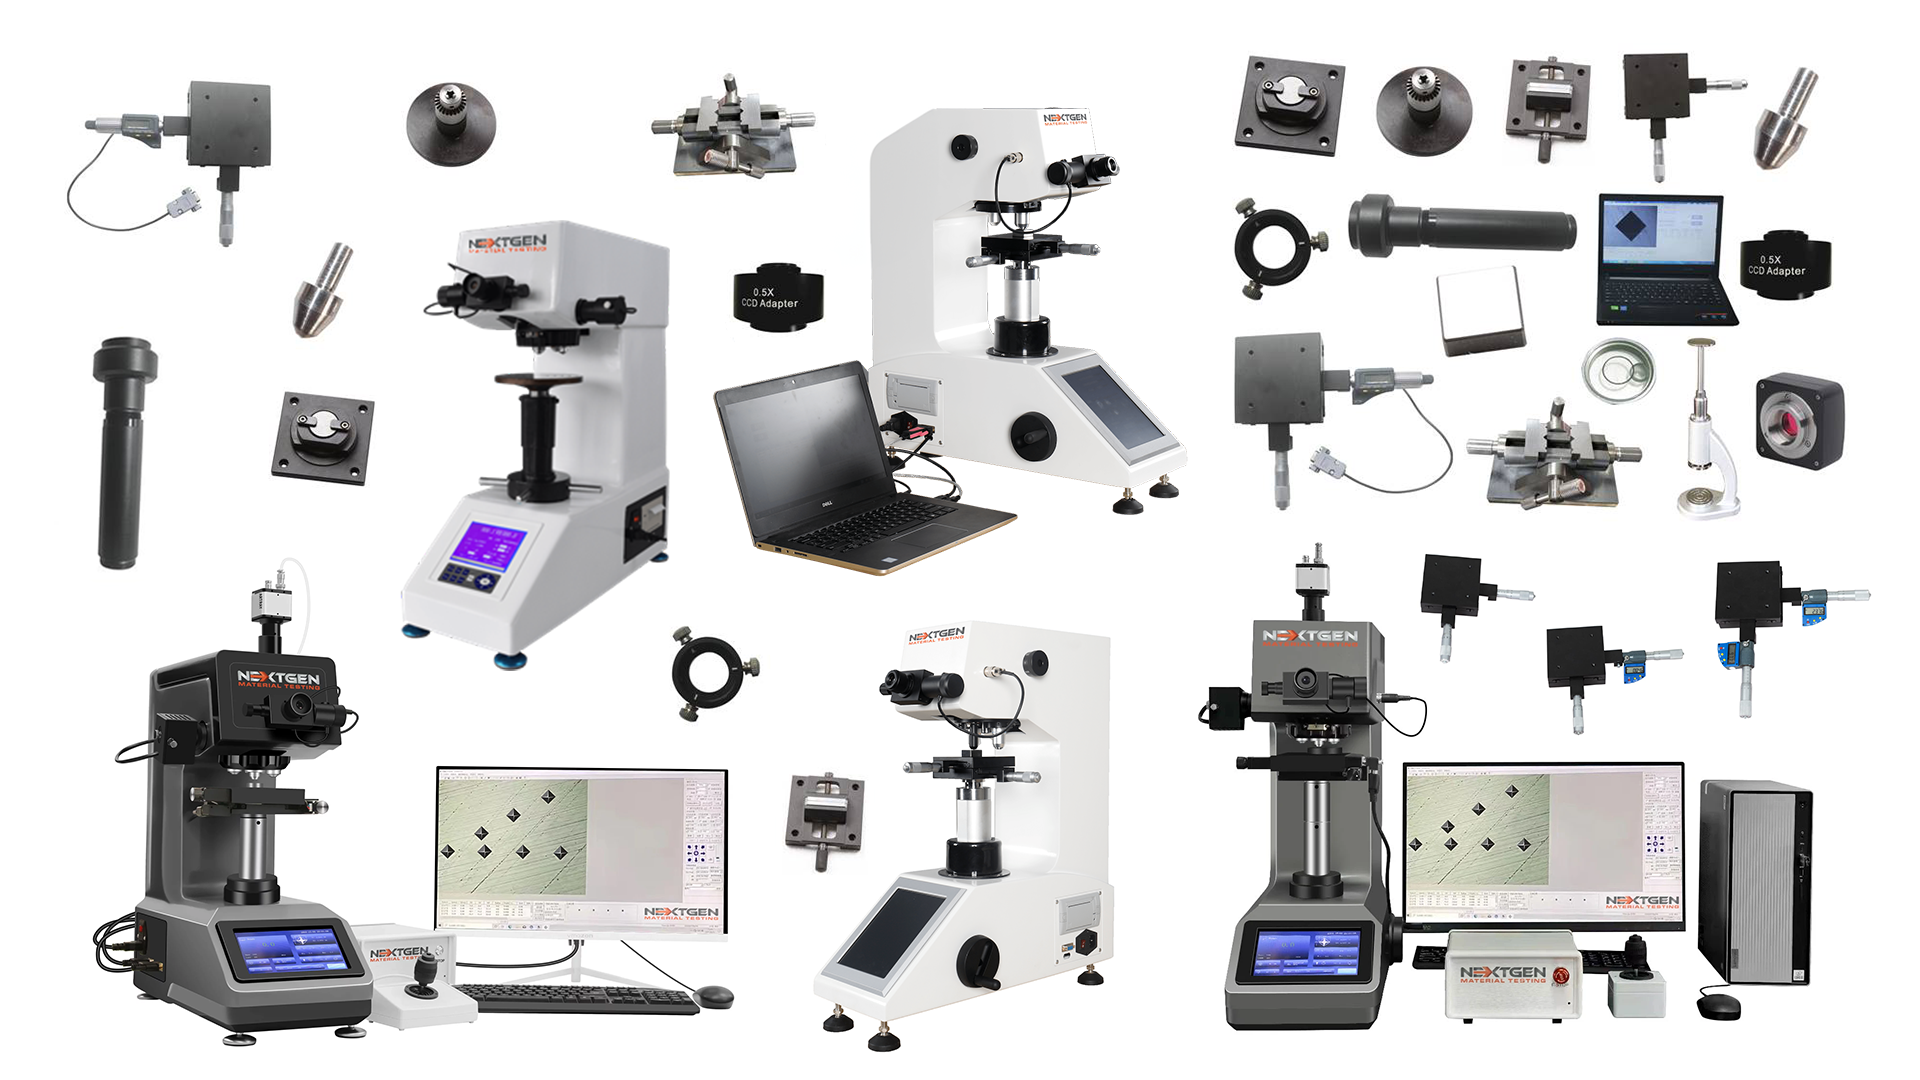
Hardness Testers for Micro and Macro Testing
At NextGen Material Testing, we supply hardness testers for every scale and workflow. From micro Vickers and Knoop for thin layers and small parts to macro Vickers for bulk materials. If you are planning a new purchase or an upgrade, start with the two best-selling systems below. Each covers a clear use case and follows ASTM and ISO methods.
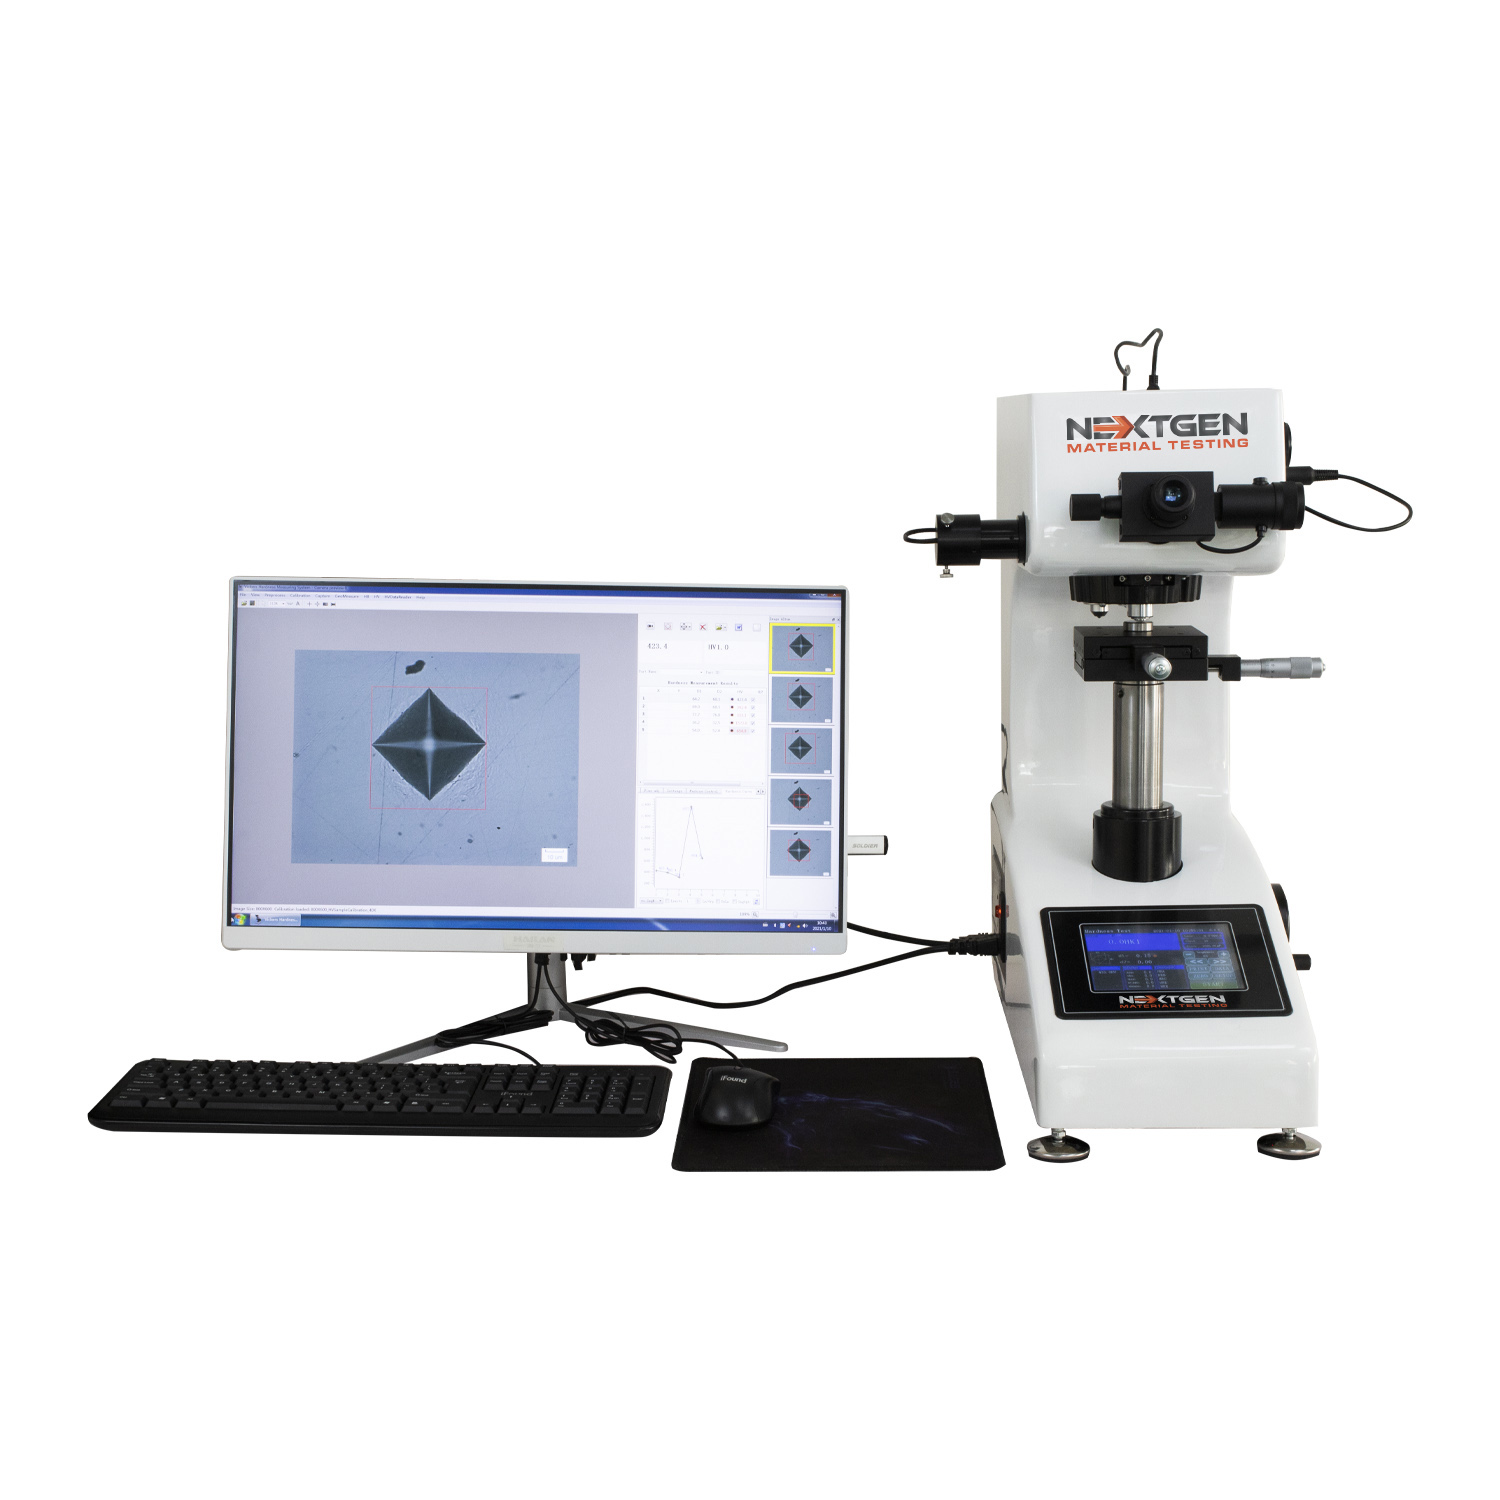
NG-1000 Micro Vickers and Knoop Hardness Tester
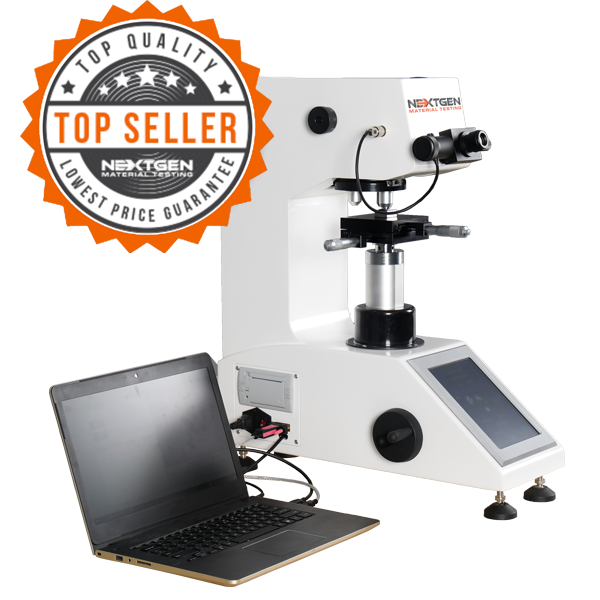 The NG-1000 series is built for microhardness testing on coatings, case-hardened layers, and fine microstructures. Loads span 10 gf to 1000 gf. Vickers and Knoop are both supported. Choose AGEN, DGEN, or CCD configurations. All models feature an automatic turret, LED illumination, and precise optics. Standards covered include ASTM E384, ASTM E92, ISO 6507, ISO 4545.
With the CCD option, analysis software measures indents, plots hardness profiles, converts HV to common Rockwell and Brinell scales, and generates reports. Semi-automatic and fully automatic upgrades add XY stage control and automated Z focus. Typical magnifications are 100× for observation and 400× for measurement. The system supports HV0.01 to HV1, with optional HV2, and a minimum measuring unit of 0.01 μm.
NG-5000 Series Macro Vickers Hardness Tester
 The NG-5000 series serves macrohardness testing of bulk materials and full-size parts. Load ranges cover 0.3 kgf to 50 kgf, depending on the model, with HV0.3 to HV50 scales. A motorized turret comes standard. You can work through the eyepiece or add a CCD camera with software for optical measurement, statistics, conversions, and report templates. Standards covered include ASTM E384, ASTM E92, ISO 6507.
Each unit includes a large display and a built-in printer. Data export is available via USB or RS-232 to Word or Excel. Semi-automatic and fully automatic versions add XY stage control and automated Z focus for mapped traverses and hardness curves. Typical magnifications are 100× for observation and 400× for measurement. The platform ships with a Vickers diamond, a traceable test block, and an accessory kit ready for lab use.
How Microhardness and Macrohardness Testing Work Together
Micro- and macrohardness testing might seem similar, yet they serve very different purposes. Microtesting focuses on small details — thin coatings, fine structures, and local hardness variations that define how a surface performs. Macrotesting, on the other hand, looks at the bigger picture — the overall hardness of a bulk material, a finished part, or a production batch.
Both methods rely on the same principle: a controlled indentation made by a harder object. What changes is the scale: micro tests use light loads and high magnification, while macro tests use heavier loads and larger impressions. Together, they form a complete system for evaluating material performance from the surface to the core. Knowing when and why to use each allows engineers and labs to get precise, reliable data every time.
If you are considering upgrading your hardness testing equipment, explore NextGen Material Testing’s professional lineup. The NG-1000 Micro Vickers and Knoop Hardness Tester is ideal for coatings, case-hardened layers, and microstructural studies, while the NG-5000 Macro Vickers Hardness Tester is designed for larger samples and quality control.
For inquiries or support, please request a quote or contact us directly — our team is ready to assist you with the right solution for your testing needs.